Yana Skakun

Creating an Elopement Timeline: How to Structure Your Day
By Yana Skakun·10 July 2026·8 min read
Of all the questions couples ask me in the run-up to their day, the one that causes the most quiet anxiety is also the simplest: "What actually happens, and in what order?" With a large wedding, the structure is more or less inherited — ceremony, drinks reception, speeches, breakfast, first dance — and everyone slots into it without much thought. An elopement has no inherited structure. You are building the day from nothing, which is exactly what makes it feel so personal, and exactly why an elopement timeline is worth genuinely thinking through rather than leaving to chance.
A good timeline is not a rigid schedule that turns your wedding day into a series of appointments. It is closer to a loose scaffold that protects the things that matter — light, energy, the people you have chosen to include — while leaving enough room for the day to breathe. As an elopement photographer based in Cambridge, I have built timelines for couples marrying on the coast, in the Fens, in the hills of the Lake District, and in registry offices a mile from home. The details change every time, but the underlying principles stay remarkably consistent.
Start with Your Legal Ceremony Time and Work Outward
Almost every elopement timeline in England and Wales is built around one fixed, immovable point: the time booked with the registrar, or the time slot given by your chosen venue if you are having a legal ceremony there. Everything else in the day is negotiable. This one is not. Registrars typically work in tightly scheduled slots, especially at register offices, and arriving late can mean losing your appointment entirely rather than simply running a few minutes behind.
Once that time is locked in, work outward in both directions. Ask yourself what needs to happen before the ceremony — getting ready, first look, travel to the venue — and build in more time than you think you need for each stage. Then ask what happens afterwards: photographs, a meal, travel to a second location, and the point at which the day naturally winds down. I always ask couples to send me their ceremony time as early as possible, because it is the anchor the rest of the plan is built around.
Build in More Buffer Than Feels Necessary
The single most common mistake I see in elopement timelines is under-estimating travel time and over-estimating how quickly two people can get ready, get in a car, and arrive somewhere looking composed. Add twenty minutes to every journey you plan, particularly if any part of the day involves rural roads, tidal causeways, or parking that is not guaranteed. Add ten minutes to every "quick" changeover between locations, because there is always a missing shoe, a windswept hairstyle needing a fix, or a conversation that runs on a little longer than expected.
Buffer time is not wasted time. Unused buffer becomes an unplanned extra ten minutes of photographs in beautiful light, or a moment to simply stand together and take in what is happening before the next thing begins. Timelines that are built too tightly tend to produce a day that feels rushed even when nothing technically went wrong, simply because there was never a moment of slack to actually enjoy it.
Chase the Light, Not the Clock
If your elopement includes an outdoor ceremony, a scenic hike, or a portrait session at a landscape location, the timeline should bend around light rather than around round numbers on a clock. The hour before sunset and, for early risers, the hour after sunrise consistently produce the most flattering, most atmospheric photographs of the whole day. If your legal ceremony can be scheduled flexibly, I will often suggest timing it — or timing the couple portraits that follow it — to land inside that golden hour window rather than at an arbitrary midday slot.
This is where working with a photographer who knows the UK's seasonal light changes genuinely earns its keep. Sunset in December in Cambridgeshire is before four in the afternoon; in June it is closer to nine thirty at night. A timeline built for a summer elopement will not transfer directly to a winter one, and the golden hour portrait slot needs to move by hours, not minutes, between the two. I build every timeline around the actual sunrise and sunset times for your date and location, not a generic template.
A Sample Timeline for a Single-Location Day Elopement
Every elopement is different, but a structure like this works well for a couple marrying and photographing everything in and around one location on the same day:
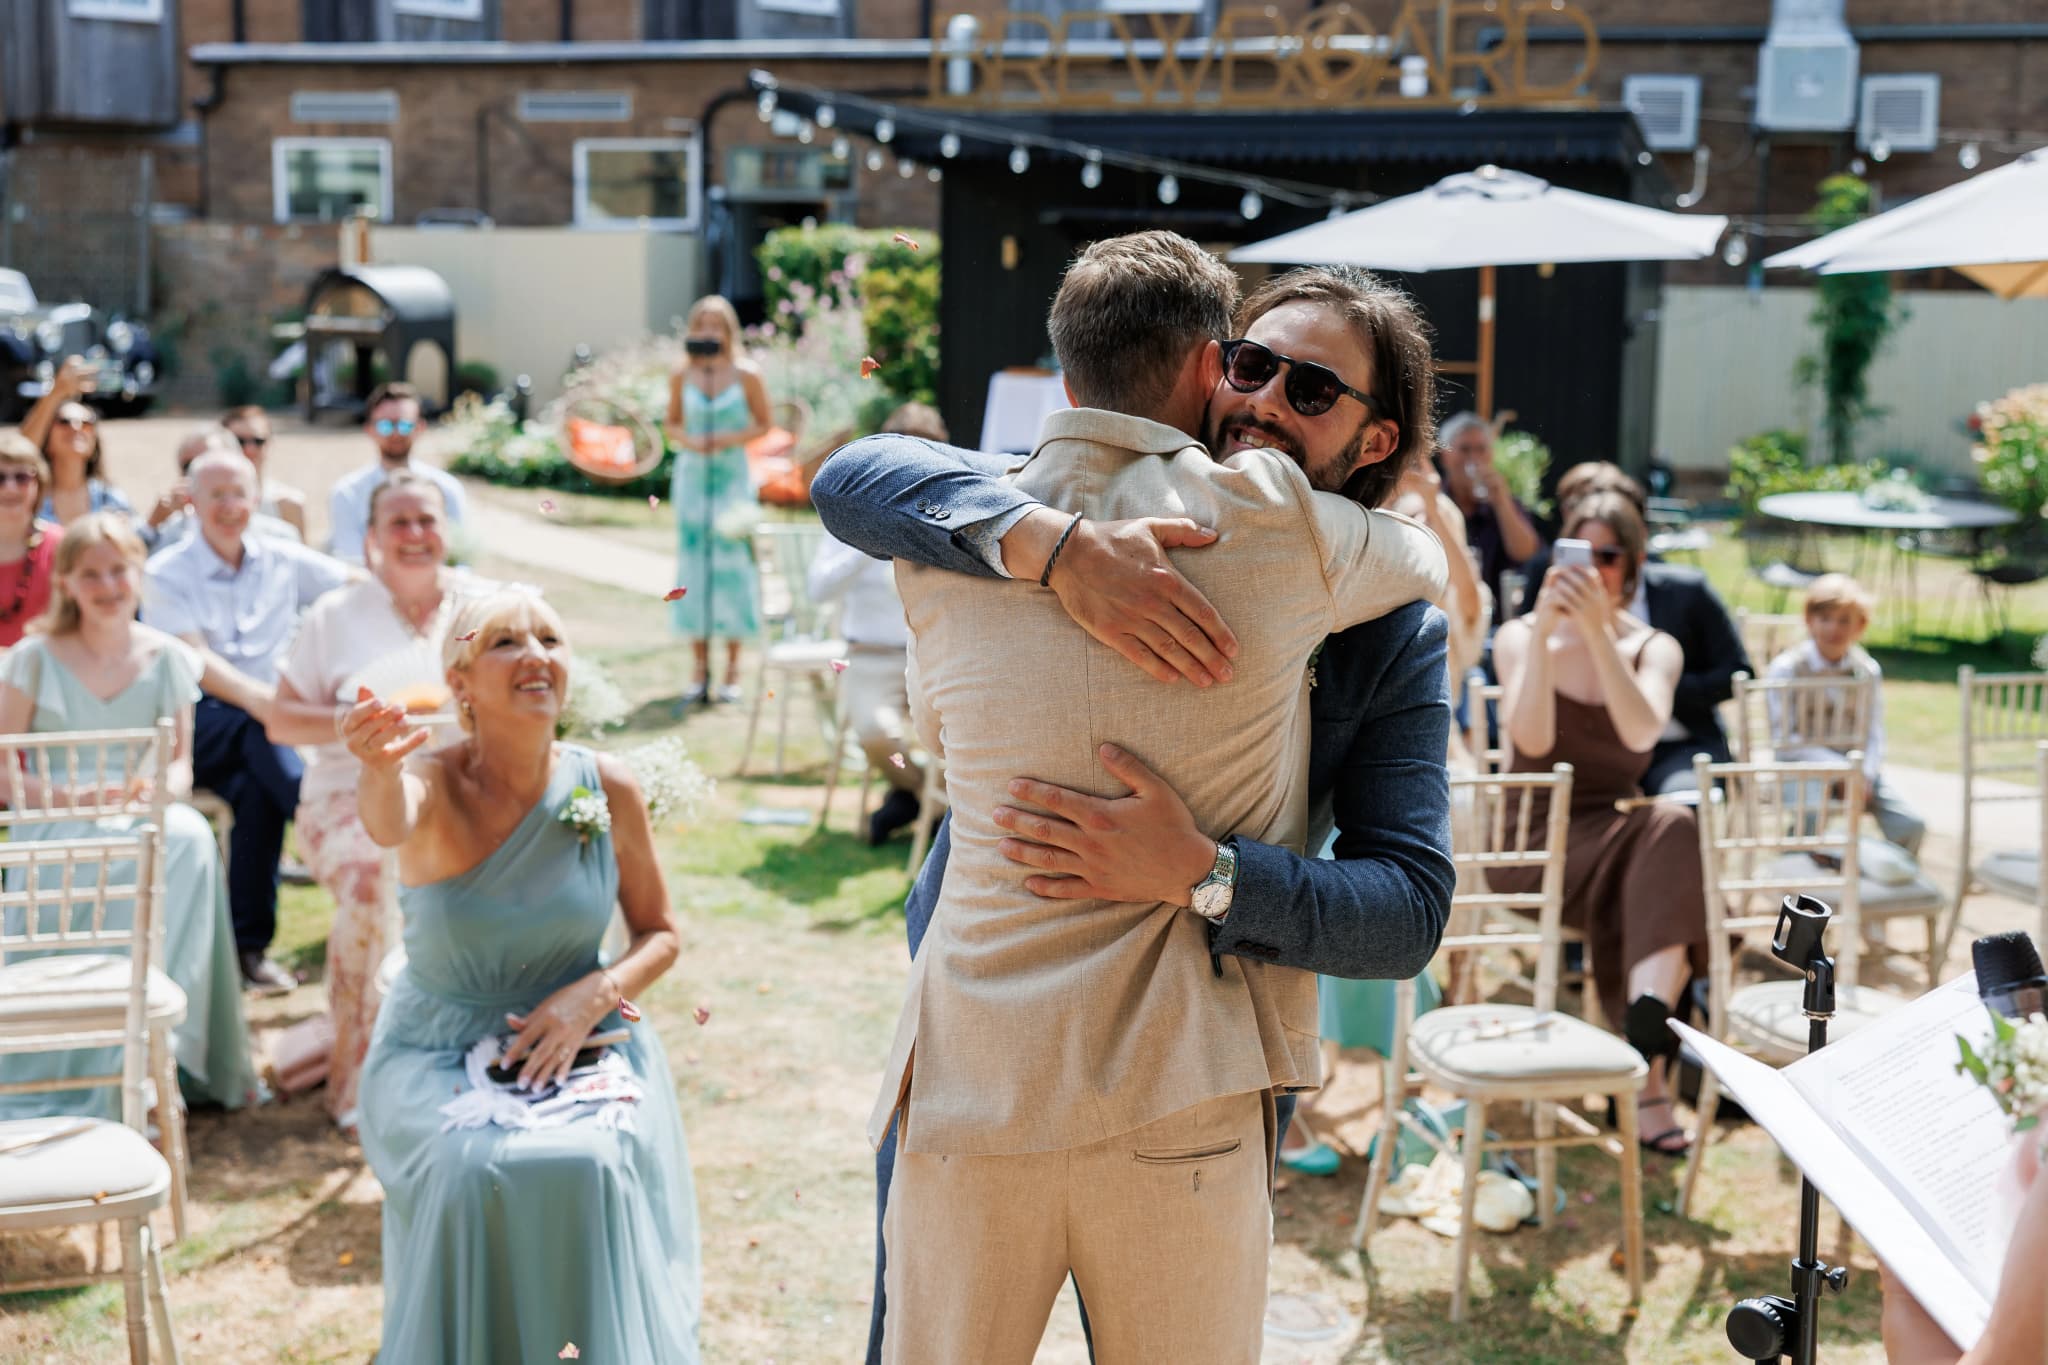
Late morning: getting ready, with a first look or the moment of putting on the dress and suit photographed in natural window light. Around midday: travel to the ceremony venue, allowing generous buffer. Early afternoon: the legal ceremony itself, typically fifteen to thirty minutes depending on the format. Immediately after: a period of unstructured time — confetti, hugs, the first minutes as a married couple — that should never be scheduled too tightly, because it tends to produce the most genuine images of the day. Mid-to-late afternoon: a relaxed walk or portrait session at a second, more scenic spot if one is included. Early evening: a meal, whether that is a quiet restaurant table for two or a small gathering with close family. If the couple wants sunset portraits, those are slotted in around the actual sunset time for the date, which might mean the meal happens before or after depending on the season.
This kind of structure gives roughly six to eight hours of coverage, which is generally enough to capture getting ready through to golden hour without feeling like a marathon. Couples who want less coverage — just the ceremony and a short portrait session — can compress this into two or three hours very comfortably; the same principles simply apply on a smaller scale.
Planning your own timeline
Every elopement timeline I put together is built specifically around your ceremony time, your location, and the season you are marrying in. If you are still working out the shape of your day, I am happy to talk through options before anything is booked — it often helps to have a second pair of eyes on the plan early rather than after the venue and registrar are already confirmed.
Get in touchMulti-Location Elopements: Moving Between Sites
Some of the elopements I photograph involve two or three locations across a single day — a registry office in Cambridge followed by portraits on the coast, for example, or a hilltop ceremony followed by an evening meal somewhere entirely different. These days need a more deliberate timeline because travel becomes a genuine variable rather than an afterthought.
For multi-location days, I ask couples to think in terms of blocks rather than exact minutes: a getting-ready block, a travel block, a ceremony block, a second travel block, a portraits block, and so on. Each block gets a generous estimate, and I build in a fixed check-in point roughly halfway through the day where we can look at how things are actually running and adjust the back half of the plan if needed. This flexibility matters enormously with UK weather and UK roads, both of which are notoriously unwilling to stick to a printed schedule.
If a second location involves a significant hike or a tidal beach, research the practical logistics properly in advance — parking, walking time in wedding shoes, tide tables if relevant — and build the timeline around the least convenient version of those logistics rather than the best case. It is far better to arrive early with time to spare than to be racing a falling tide or a locked car park gate in a wedding dress.
Where Photography Fits Into the Timeline
A frequent question is how much of the day actually needs to be set aside purely for photographs, separate from the ceremony and everything else. My honest answer is: less than most couples fear, and it is rarely a separate block at all. Most of the strongest images from an elopement come from documenting things that were happening anyway — getting ready, the ceremony, the walk to the car, the meal — rather than from a dedicated posed session.
That said, it is worth building in one deliberate period, usually twenty to forty minutes, purely for portraits at whichever location has the best light and backdrop that day. This is the one part of the timeline I do treat as sacred, because it consistently produces the images couples end up loving most and printing largest. Everything else in the day can flex around minor delays; this window is the one I protect. If you are also considering a full wedding photography package rather than a pure elopement, it is worth looking at how coverage differs across wedding photography generally and comparing that against pricing for each format, since elopement coverage is usually structured and priced quite differently from a full wedding day.
Building in Time to Actually Be Married
The timelines that work best always contain at least one stretch of genuinely unscheduled time — ten or fifteen minutes with nothing planned, no photographs being deliberately composed, nowhere to be next. Couples consistently tell me afterwards that this was among their favourite parts of the day, simply because it was the one moment they were not being moved from one thing to the next. I build this in deliberately, usually straight after the ceremony, and I photograph it quietly from a distance rather than directing it, because directed moments and genuine moments read very differently in the final images.
If you are planning to invite a small number of guests — parents, one or two close friends — factor their needs into the timeline too. A short ceremony followed by a relaxed meal works well for guests of any age; a day involving a long hike to a remote location is worth thinking through carefully if anyone attending has mobility considerations. A guest list of even four or five people changes the logistics meaningfully, so it is worth deciding early whether your elopement is a two-person day or a small-group one, since the timeline for each looks quite different.
A Simple Framework You Can Use to Build Your Own
If you want to sketch a rough timeline yourself before speaking to a photographer or planner, start with these five questions in order: What time is the legal ceremony booked for? How long does travel realistically take between each location, with buffer added? What time is sunrise and sunset on your date? Is there a meal, and does it need to happen at a specific time for a restaurant booking? And finally, where in the day is there room for twenty unscheduled minutes with nothing planned? Answering those five questions in order gives you the skeleton of a workable timeline, and everything else — hair and makeup, outfit changes, specific photograph requests — can be layered on afterwards.
Once the shape of the day is settled, it is worth thinking ahead to how the images will eventually be presented, whether that means a simple digital gallery or a printed wedding album that brings the whole day back together in one place. Couples who plan for this at the timeline stage, rather than after the day is over, tend to end up with a set of images that tells the story properly from start to finish.
Every elopement I photograph starts with a conversation about exactly this — not a rigid script, but a realistic, well-paced structure that protects the moments that matter and leaves room for the day to unfold naturally. If you are planning an elopement anywhere in Cambridgeshire or further afield and would like help shaping the timeline before anything else is booked, get in touch with Yana Skakun Photography and we can start working through the details together.


Yana Skakun
Photographer · England
Professional wedding, family and portrait photographer based in England. Passionate about capturing authentic emotions and timeless moments.
About Yana →elopement timelineelopement planninghow to plan an elopementelopement photographer UKwedding day scheduleCambridge elopement photographer
Elopement — Professional Photography in Cambridge & England
Yana Skakun is a professional photographer based in Cambridge, covering weddings, families, and portraits across England. Every session is personal — planned around your story, your people, and the moments that matter most. This guide — Creating an Elopement Timeline: How to Structure Your Day — is part of the photography journal: practical, experience-based advice drawn from real sessions across England. Whether you arrived searching for elopement timeline or elopement planning, the same care and attention shapes every session Yana photographs.
Professional Photography sessions are available year-round, with bookings open across Cambridge, Ely, Huntingdon, Peterborough, and further afield — East England, London, the Midlands, and beyond. If you have specific questions about how to plan an elopement, mention it in your enquiry. Get in touch through the contact form above to check availability and discuss your session. Enquiries are welcomed from anywhere in the UK.
Frequently Asked Questions
What camera settings should I use for outdoor portraits?+
For outdoor portraits, shoot in aperture priority mode. Use a wide aperture (f/1.8–f/2.8) to blur the background and isolate your subject. Keep ISO as low as possible in good light. In bright conditions, use a neutral density filter or switch to manual to avoid overexposure at wide apertures.
What is the golden hour in photography?+
Golden hour is the period roughly 30–60 minutes after sunrise and before sunset. The sun is low in the sky, producing warm, soft, directional light that flatters skin tones and creates beautiful long shadows. It's widely considered the best natural light for portrait and outdoor photography.
How do you get sharp photos in low light?+
In low light, increase your ISO (accepting some grain), use the widest aperture your lens allows, and slow your shutter speed to the slowest you can hand-hold without camera shake (roughly 1/focal length as a guide). Use image stabilisation if available, and consider a tripod for static subjects.
What is the rule of thirds in photography?+
The rule of thirds divides the frame into a 3×3 grid. Placing your subject on one of the four intersection points — rather than dead centre — creates a more dynamic, visually interesting composition. It's a guideline, not a rule: some of the most powerful images break it deliberately.
How do you edit photos to look professional?+
Professional editing starts with shooting in RAW format. In Lightroom or similar software, correct exposure, white balance, and contrast first. Recover shadow and highlight detail. Apply gentle colour grading for mood. Be conservative with skin retouching — the goal is natural enhancement, not transformation. Consistency across a set of images is what separates professional from amateur editing.
Continue Reading
Related Articles

Get in Touch
Ready to Book Your Session?
Get in touch to discuss your vision — I'll reply within 24 hours.